


Step 1: Ignite Your Creative Spark for Picture Placement
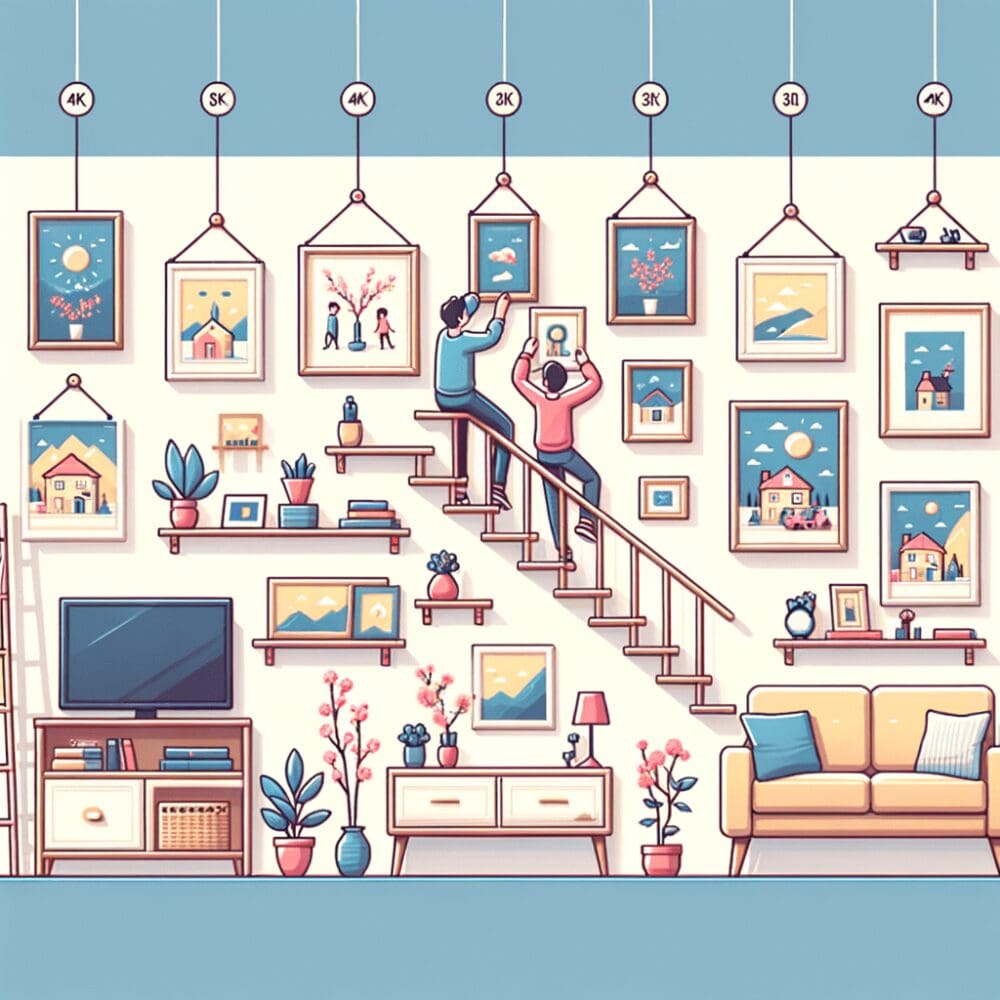
Moving to a new place, the empty walls can seem a little intimidating. But remember, this is your fresh canvas, an opportunity to decorate your space as you always envisioned. Hang your pictures in a way that tells your unique story, expresses your personality, and turns your new house into a home. Create a theme based on color, subject, or frame style to add continuity to your display. You can go for a classic gallery wall, mix and match different shapes and sizes, or create a sprawling collection that spans multiple walls. With a little creativity, the task of hanging pictures after a move can be fun and rewarding. And if you want to try your hand at creating your own images, try to learn how to make AI pictures. It is fun!
Updated for 2026 — this guide reflects the latest moving tips and pricing for the Greater Vancouver area.
Table of Contents
- Step 1: Ignite Your Creative Spark for Picture Placement
- Step 2: Picture Hanging Tools: Your Key to Success
- Step 3: Know Your Wall Type
- Step 4: Choose the Right Hardware
- Step 5: Master the Art of Perfect Picture Alignment
- Step 6: Planning a Gallery Wall
- Step 7: Common Mistakes to Avoid
- Step 8: Add the Finishing Touches for Breathtaking Walls
- FAQs
- Protecting Your Artwork During the Move Itself
- Working with Rental Property Walls
- Trust Simple Moves for a Damage-Free Relocation
- Read More
Step 2: Picture Hanging Tools: Your Key to Success
Having the right tools can make hanging pictures after a move much easier. You will need a hammer, level, tape measure, pencil, wall hooks, and of course, your beautiful pictures. Do not forget to use a stud finder if you plan to hang heavier pieces; it is an invaluable tool that will help you find the strongest part of the wall to support the weight. With these tools, you can ensure that your pictures will stay secure and perfectly aligned. The right picture hanging tools are indeed your key to success.
Step 3: Know Your Wall Type
Before you start hammering nails into your walls, it is important to understand what your walls are actually made of. Different wall materials require different hanging methods, and using the wrong approach can result in fallen frames, cracked walls, or holes that are far bigger than they need to be.
Drywall is the most common wall material in Canadian homes. It is relatively soft, which makes it easy to drive nails into but also means it cannot support heavy weight on its own. For lightweight frames under five pounds, a simple nail angled at 45 degrees will work fine. For anything heavier, you will need to either find a stud behind the drywall or use drywall anchors.
Plaster walls are found in many older homes throughout the Lower Mainland. Plaster is harder and more brittle than drywall, so it can crack if you try to hammer a nail straight in. The best approach is to place a small piece of painter’s tape over the spot before drilling, which helps prevent cracking. Use a drill with a masonry bit to create a pilot hole, then insert a screw anchor.
Concrete or masonry walls are common in basement suites and newer condo buildings. These walls require special concrete anchors and a hammer drill to create holes. Regular nails will not penetrate concrete, so do not even try. If you are renting and do not want to drill into concrete, adhesive hanging strips rated for the weight of your frame are a damage-free alternative.
Step 4: Choose the Right Hardware
Matching the right hardware to your picture and wall type is essential for a secure hang. Here is a quick guide to help you choose:
Standard nails work well for lightweight frames up to five pounds on drywall. Angle the nail at 45 degrees for better holding power. Picture hooks are a step up from bare nails and distribute weight more effectively. They come in various weight ratings, so check the package to match the hook to your frame’s weight.
Drywall anchors are necessary for medium to heavy frames on drywall when you cannot hit a stud. Toggle bolt anchors can support up to 50 pounds and are ideal for large mirrors or heavy canvas prints. Picture wire strung between two D-ring hangers on the back of the frame gives you flexibility to adjust the picture’s position without making new holes. This setup is especially useful for large frames because the weight is distributed across two points instead of one.
Adhesive strips such as Command Strips are perfect for renters or anyone who wants to avoid putting holes in the wall. They work best on smooth, clean surfaces and can hold frames up to about 16 pounds depending on the product. Just make sure to follow the weight guidelines on the packaging and avoid using them on textured walls where the adhesive may not bond properly.
Step 5: Master the Art of Perfect Picture Alignment
Getting your pictures perfectly aligned can be a challenge, but it is a skill that can be mastered with practice. Use a tape measure and level to make sure your pictures are straight and evenly spaced. A good rule of thumb for picture alignment is to hang your pictures at eye level, approximately 57 inches from the floor to the center of the image. This makes your artwork easily viewable and creates a harmonious visual flow throughout your space. Become the master of perfect picture alignment and your walls will look professionally decorated!
Step 6: Planning a Gallery Wall
A gallery wall is one of the most popular ways to display multiple pictures together, and it is a great way to fill a large empty wall in your new home. The key to a great gallery wall is planning the layout before putting any holes in the wall.
Start by laying all your frames on the floor and arranging them until you find a composition you like. Keep spacing consistent, usually about two to three inches between frames. A mix of frame sizes and orientations adds visual interest, but try to maintain a common element like frame colour or mat style to keep the arrangement cohesive.
Once you are happy with the floor layout, trace each frame onto kraft paper or newspaper, cut out the shapes, and tape them to the wall with painter’s tape. This lets you see exactly how the gallery will look and make adjustments without putting any holes in the wall. When you are satisfied with the placement, hammer your nails through the paper templates, then remove the paper and hang your frames. This method takes a bit more time upfront but saves you from unnecessary holes and crooked arrangements.
Step 7: Common Mistakes to Avoid
Even experienced decorators make mistakes when hanging pictures. Here are the most common ones to watch out for. Hanging pictures too high is the number one mistake. Most people instinctively hang art too far above eye level, which makes it feel disconnected from the room. Stick to the 57-inch rule for standalone pieces. Above a sofa, the bottom of the frame should be six to eight inches above the back of the furniture.
Using a nail that is too small for the frame’s weight is another frequent error. When in doubt, go one size up on the hardware. A frame that falls off the wall can damage itself, the wall, and anything below it. Skipping the level is tempting when you are eager to see the final result, but even a slight tilt is noticeable and will bother you every time you look at it. Take the extra thirty seconds to check.
Finally, avoid hanging pictures in direct sunlight. UV rays fade photographs, prints, and artwork over time. If you have a sun-drenched wall that you want to decorate, consider using UV-protective glass in your frames or rotating your artwork seasonally to reduce exposure.
Step 8: Add the Finishing Touches for Breathtaking Walls
Once you have hung your pictures, it is time to step back and admire your work. But the job is not over yet. Add the finishing touches by adjusting the lighting to highlight your artwork, adding decorative elements to complement your pictures, or even rearranging the furniture to accentuate your new wall decor. These finishing touches can transform your walls from ordinary to breathtaking, making your new home truly your own.
Need help getting your artwork and mirrors to your new home safely in the first place? Simple Moves specializes in careful handling of fragile and valuable items. Our movers pad-wrap framed art, mirrors, and glass pieces individually so they arrive at your new home ready to hang. One less thing to worry about on moving day.
FAQs
Q: What tools do I need to hang pictures?
A: You will need a hammer, level, tape measure, pencil, wall hooks, and a stud finder for heavier pieces.
Q: How high should I hang my pictures?
A: A good rule of thumb is to hang your pictures approximately 57 inches from the floor to the center of the image for optimal viewing.
Q: Can I create a theme with my pictures?
A: Absolutely! A theme based on color, subject, or frame style can add continuity to your display and make it more visually appealing.
Q: How do I hang pictures on concrete walls?
A: Concrete walls require a hammer drill and concrete anchors. If you prefer not to drill, heavy-duty adhesive strips are a damage-free alternative for lighter frames.
Q: What is the best way to plan a gallery wall?
A: Lay your frames out on the floor first, then trace them onto paper and tape the templates to the wall. This lets you perfect the layout before making any holes.
Protecting Your Artwork During the Move Itself
Hanging pictures perfectly means nothing if the frames arrive damaged. Before packing, remove glass-covered artwork from frames when possible, wrapping the glass and frame separately in bubble wrap. For pieces that cannot be disassembled, tape an X across the glass with painter’s tape—this will not prevent cracks, but it keeps shards contained and protects the artwork behind the glass if impact occurs.
Use purpose-built picture boxes (also called mirror boxes) for valuable or oversized pieces. These telescoping cardboard boxes adjust to fit different frame sizes and provide significantly more protection than wrapping a frame in a moving blanket alone. Stand picture boxes upright in the truck rather than laying them flat, and place them between mattresses or sofa cushions for additional padding during transit.
Working with Rental Property Walls
If you are renting your new home, you may face restrictions on drilling holes or using heavy-duty anchors. Adhesive picture-hanging strips rated for specific weights are a reliable damage-free option for frames under seven kilograms. For heavier pieces, ask your landlord for written permission before drilling—most landlords are willing to allow a few nail holes if you agree to patch them at move-out.
When patching small nail holes, use a lightweight spackle applied with your fingertip, let it dry, and sand lightly with fine-grit sandpaper. A dab of matching paint over the patch makes it virtually invisible. Keep a record of every hole you create so you can address them all before your final walkthrough and protect your damage deposit.
Trust Simple Moves for a Damage-Free Relocation
Your artwork deserves the same care during transit that you give it on your walls. Simple Moves is a full-service moving company that provides both the trained crew and the trucks, using professional wrapping and padding to protect frames, mirrors, and canvases. Request a free quote or call (604) 398-4680 to ensure your pictures arrive ready to hang.